Creating visually appealing presentations can be a fun and creative process. One way to enhance your slides is by making shapes transparent in Google Slides. This feature allows you to layer elements, create interesting effects, and improve the overall look of your presentation. In this guide, we'll walk you through the steps to achieve transparency in your shapes and explore some practical applications of this technique.
Overview
- Transparency lets you layer shapes and text for better visuals.
- Making shapes transparent is a simple process that anyone can do.
- You can adjust the transparency level to suit your design needs.
- Transparent shapes can help highlight important information.
- This technique can be used creatively for watermarks and overlays.
Transparency in Google Slides: What is and Why it Matters
What is Transparency?
Transparency in Google Slides refers to how see-through an object, like a shape or image, is. It allows you to blend elements together, making your slides more visually appealing. When you adjust transparency, you can control how much of the background or other objects show through.
Why Use Transparency in Slides?
Using transparency can enhance your presentations in several ways:
- Focus Attention: It helps highlight important information by making other elements less prominent.
- Create Depth: Layering transparent shapes can add a sense of depth to your slides.
- Visual Appeal: It can make your slides look more professional and polished.
Common Uses of Transparency in Presentations
Transparency is often used for:
- Watermarks: To add a logo or text that doesn’t distract from the main content.
- Overlays: To create effects that combine images and text seamlessly.
- Highlighting: To emphasize specific areas without overwhelming the viewer.
Transparency is a powerful tool in design, allowing for creativity and clarity in presentations.
By understanding how to use transparency effectively, you can create slides that are not only informative but also visually engaging. Remember, adjusting transparency can transform your presentation into a more dynamic experience for your audience.
Preparing Your Slide for Transparency
Selecting the Right Slide
To start, choose the slide where you want to add transparency. Make sure it fits your overall presentation theme. Here are some tips:
- Look for slides with a clear background.
- Ensure the content is not too crowded.
- Consider the message you want to convey.
Choosing the Shape to Make Transparent
Next, pick the shape you want to adjust. This could be a rectangle, circle, or any other shape. Here’s how to select it:
- Click on the shape you want to modify.
- Make sure it’s the right size and position.
- Check if it complements other elements on the slide.
Setting Up Your Workspace
Before making changes, set up your workspace for easy access:
- Open the Format menu at the top.
- Familiarize yourself with the Fill Color options.
- Keep the Transparency slider visible for quick adjustments.
Remember, a well-prepared slide can enhance the impact of your presentation. Transparency can help highlight important information.
Making a Shape Transparent in Google Slides
Accessing the Format Options
To start making a shape transparent, first, you need to select the shape you want to modify. Here’s how:
- Click on the shape in your slide.
- Go to the top menu and click on the Format option.
- Look for the Fill Color icon in the toolbar.
Adjusting the Transparency Slider
Once you have accessed the format options, you can adjust the transparency:
- Click on the Fill Color icon.
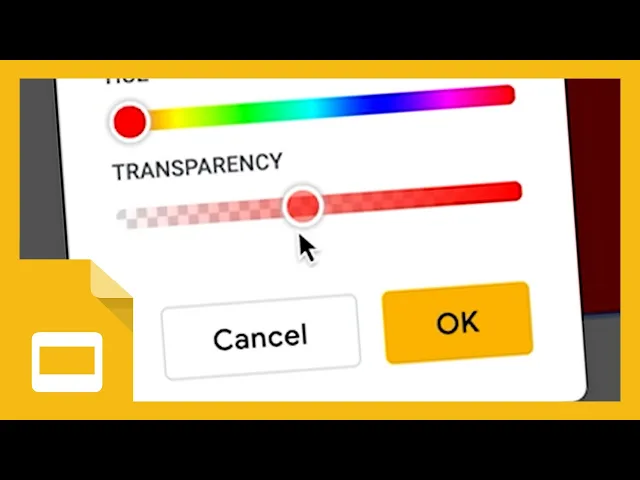
- At the bottom of the color palette, you will find the Transparency slider.
- Drag the slider left to decrease opacity or right to increase it. You can see the changes in real-time!
Previewing the Changes
After adjusting the transparency, it’s important to preview your changes:
- Click outside the shape to see how it looks on the slide.
- If you’re not satisfied, simply click back on the shape and adjust the slider again.
- Remember, you can always revert to the original settings if needed.
Making shapes transparent can greatly enhance your presentation's visual appeal. It allows you to layer elements creatively, giving your slides a professional touch.
Advanced Transparency Techniques

Layering Transparent Shapes
Layering shapes with different transparency levels can create a stunning visual effect. Here’s how to do it:
- Select the first shape and adjust its transparency.
- Add a second shape on top, adjusting its transparency as well.
- Experiment with different colors and opacities to achieve the desired look.
Combining Transparency with Other Effects
Using transparency alongside other effects can enhance your presentation. Consider these techniques:
- Shadow Effects: Add shadows to transparent shapes for depth.
- Blur Effects: Combine transparency with blur to soften edges.
- Color Gradients: Use gradients to create a smooth transition between colors and transparency.
Using Transparency for Highlighting
Transparency can be a powerful tool for emphasizing key points. Here’s how:
- Overlay a transparent shape over text to draw attention.
- Use semi-transparent colors to highlight important data in charts.
- Create watermarks by placing a transparent logo behind text or images.
Transparency is not just about making things see-through; it’s about enhancing your message and making your slides more engaging. Experiment with different levels to find what works best for your presentation!
Troubleshooting Common Issues

Shape Not Becoming Transparent
If you find that your shape isn't becoming transparent, here are some steps to follow:
- Ensure the shape is selected. If you're having trouble adjusting the transparency level of a shape, double-check that you have selected the shape and are on the correct tab in the toolbar.
- Check if the shape is locked. Sometimes, shapes can be locked, preventing any changes.
- Make sure you are using the right transparency settings.
Transparency Not Displaying Correctly
If the transparency isn't showing as expected, consider these points:
- Refresh the slide to see if the changes take effect.
- Check if there are overlapping shapes that might be hiding the transparency.
- Ensure that your presentation is in the correct mode (edit vs. presentation).
Reverting Changes
If you want to go back to the original shape:
- Use the undo button (Ctrl + Z) to revert your last action.
- If you saved changes, you can reset the shape by selecting it and choosing the default fill color.
- Consider duplicating the shape before making changes, so you have a backup.
Remember, troubleshooting can often be a simple fix. Stay patient and check each step carefully!
Practical Applications of Transparency
Creating Watermarks
Using transparency can help you create subtle watermarks on your slides. This is useful for branding or copyright purposes. Here’s how you can do it:
- Select the shape or image you want to use as a watermark.
- Adjust the transparency to around 50% or less.
- Position it in a corner or center of the slide.
Designing Overlays
Transparent shapes can be used to create overlays that enhance your presentation. This technique can help in:
- Highlighting important information.
- Adding depth to your design.
- Blending images with text for a cohesive look.
Enhancing Visual Appeal
Transparency can significantly improve the visual appeal of your slides. Here are some ways to use it:
- Combine transparent shapes with vibrant colors to create eye-catching designs.
- Use transparency to soften backgrounds, making text easier to read.
- Layer multiple transparent shapes for a unique effect.
Transparency is a powerful tool that can transform your presentations, making them more engaging and professional. Experiment with different levels to find what works best for your content!
GenPPT offers practical tools to improve collaboration, enhance workflows, and bring your project ideas to life without the usual noise. Explore GenPPT now!
Conclusion
Now that you know how to make shapes transparent in Google Slides, you can easily enhance your presentations. Whether you want a shape to be slightly see-through or completely invisible, the steps are simple and quick. This feature allows you to create layered designs that look professional and appealing. Don't hesitate to experiment with different transparency levels to find what works best for your slides. With these skills, your presentations will surely stand out and impress your audience.
For an even more polished and professional look, consider using an ****AI presentation generator like GenPPT to streamline the design process.
Frequently Asked Questions
How can I make an image transparent in Google Slides?
To make an image transparent, select the image, go to the 'Format' menu, and choose 'Adjust Transparency.' You can then move the slider to set how transparent you want the image to be.
Where can I find the transparency tool in Google Slides?
You can find the transparency tool in the 'Picture Format' tab when you select an image. It allows you to adjust the transparency level easily.
What types of rectangle shapes can I add in Google Slides?
Google Slides offers a variety of rectangle shapes, including standard rectangles, rounded rectangles, and more unique shapes like stars and polygons.
Can I make my text transparent in Google Slides?
Yes, you can make text transparent by selecting the text box, going to 'Format,' and adjusting the 'Fill Color' to include transparency.
How do I make a shape completely transparent?
To make a shape completely transparent, click on the shape, go to 'Fill Color,' and select the 'Transparent' option at the bottom of the color menu.
Is it possible to adjust the transparency of different elements on a slide?
Absolutely! You can adjust the transparency of each element on your slide separately, giving you full control over your presentation's appearance.

